Peach Pie Scones

peach pie scones

As the summer progresses, I always look forward to the certain fruits that come into season.  Berries are my favorite, but, I am slowly starting to look forward to peach season as well.  I was never a big peach fan as a kid, but as an adult, I love them!  My particular favorite thing to do with peaches is to cook them.  So, when I stumbled across a recipe for peach pie scones, I couldn’t resist.

peach pie scones

These scones are moist, flaky, buttery, sweet, and just downright delicious.  I couldn’t wait to have to these alongside my coffee for a few mornings in a row.  They are the perfect indulgence to enjoy the last of the summer flavors.  Speaking of which, I can’t believe I am already seeing pumpkin flavored drinks around and Halloween isles in the stores!  I am looking forward to comfort foods and curling up by the wood stove, but I am definitely not ready to give up fresh summer vegetables and fruits.

Peach Pie Scones

Peach Pie Scones

  • 2 cups + 2 Tablespoons all-purpose flour
  • 1/3 cup brown sugar
  • 1 Tablespoon baking powder
  • 1/2 teaspoon salt
  • 1/2 cup unsalted butter, cubed and cold
  • 1 large egg
  • 1/4 cup heavy cream, plus more for brushing
  • 1/4 cup sour cream or yogurt
  • 2 teaspoons vanilla extract
  • 1/2 cup fresh peaches, diced
Vanilla glaze
  • 1/2 cup confectioners’ sugar
  • 1 Tablespoon vanilla extract
  • 1-3 Tablespoons heavy whipping cream

Directions

Preheat oven to 400ºF.  Line a baking sheet with parchment paper or a silicone baking mat.

In a large bowl, whisk together the flour, brown sugar, baking powder, and salt. Then, cut in the butter with a fork or pastry cutter until the mixture resembles coarse crumbs.

In a large glass measuring cup, whisk together the heavy cream, sour cream, egg, and vanilla extract. Slowly add the wet ingredients into the dry ingredients, and mix until just combined.  Gently fold in the peaches until combined.

On a well-floured surface, turn out the scone dough and pat into a small disk that’s about a 1/2″ thick. Cut into 6-8 slices, and transfer to the baking sheet. Brush each scone with just a little bit of heavy cream.

Bake for 16-18 minutes, or just until golden brown. Allow to cool.

For the glaze, whisk together the confectioners’ sugar, vanilla extract, and 1 tablespoon of heavy cream. If the glaze is too thick, continue adding in heavy cream, one 1 tablespoon at a time, until it has reached the desired consistency. Pour over warm scones and serve.
These can be stored covered in the refrigerator for 4 days.
Source: A Latte Food

Strawberry Rhubarb Frozen Yogurt

strawberry rhubarb frozen yogurt

I am super pumped that rhubarb is out in full force right now.  To my delight, there are several rhubarb plants on the property of the house we just bought.  I, of course, had to purchase a couple more.  There is never enough rhubarb in my opinion!  I am thinking strawberry-rhubarb jam may be in my future… I can’t wait!

Rhubarb, when sweetened correctly, can be one of the best desserts.  Especially when paired with strawberries.  This time of year, I get really excited to make frozen desserts.  Well, maybe not more excited because I always want ice cream.  Maybe I feel like it’s a better excuse to make it while the sun is hot.  Regardless of my excuses, this a well worth dessert to make.  I swapped out the corn syrup for honey, and reduced the amount of sugar, which makes it a tad healthier.  This is refreshing, slightly sweet, but still with the slight tang of yogurt.  A perfect treat after a warm day in the sun.

Strawberry Rhubarb Frozen Yogurt

For the strawberry-rhubarb

  • 2 cups chopped fresh strawberries
  • 1 cup finely chopped rhubarb
  • 1/4 cup sugar

For the frozen yogurt

  • 3 cups plain, whole milk yogurt (or plain greek-style yogurt)
  • 2 cups half-and-half
  • 1/2 cup sugar
  • 1/3 cup honey
  • 1 1/2 teaspoons vanilla extract
  • 1/4 teaspoon kosher salt

Directions

Combine the strawberries, rhubarb and 1/4 cup sugar in a small saucepan over medium heat.  Cook, stirring often, until the fruit is softened, about 6-8 minutes.  Let cool completely before using.

For the frozen yogurt, combine the yogurt, half and half, sugar, honey, vanilla extract and salt in a large bowl.  Whisk until combined.  Let sit for about 5 minutes, then whisk until the sugar is dissolved.  Cover and place in the refrigerator until completely chilled, 2-3 hours, or overnight.

When the mixture is thoroughly chilled, swirl in the strawberry mixture.  Pour into a bowl of an ice cream maker and process according to the manufacturer’s directions.  Freeze until ready to serve.

Source: Adapted from Country Living Magazine, June 2014

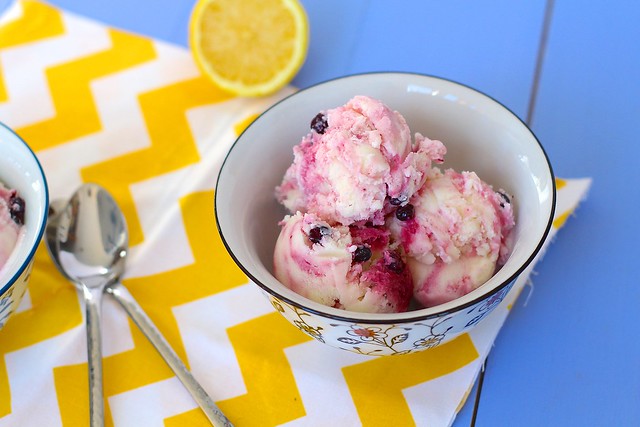
Lemon Frozen Yogurt with Blueberry Swirl

Lemon Frozen Yogurt with Blueberry Swirl

Happy Spring!  I have a hard time believing it is spring.  We still have A LOT of snow on the ground.  In fact, it’s snowing right now.  Again.  But, if you look carefully, there are a few hints of spring.  The bird songs have changed, the animals have started to move, and where the snow has melted about 5 inches from the side of our house, a few brave bulbs are peeking above the ground.  I have hope that this never ending winter will end eventually!

Lemon Frozen Yogurt with Blueberry Swirl

To celebrate spring, I wanted to share this wonderful, light and colorful dessert.  I mean really, lemon just shouts spring!  The color itself is just so refreshing.  This frozen yogurt is light, creamy and down right delicious.  Lemon and blueberry are a match made in heaven.  The blueberry swirl is optional, but highly recommended.  The sauce doesn’t freeze completely, so it makes a wonderful swirl.  Go make this today and think of warmer days (or if you are already in the warmth, sit outside with a bowl).

Lemon Frozen Yogurt with Blueberry Swirl

Lemon Frozen Yogurt with Blueberry Swirl

Yield: about 1 quart

For the frozen yogurt

  • 1 1/4 cups plain, whole milk yogurt
  • 1 1/2 cups whole milk
  • 2 Tablespoons cornstarch
  • 2 ounces cream cheese, softened
  • 1/2 cup heavy cream
  • 2/3 cup sugar
  • 1/4 cup light corn syrup
  • zest from 1-2 lemons (Large strips)

For the lemon syrup

  • 2-3 lemons
  • 3 Tablespoons sugar

For the blueberry swirl

  • 1 1/2 cups fresh or frozen blueberries
  • 1/2 cup sugar

Directions

For the lemon syrup, zest the lemons (use two lemons if you really like lemon) with a vegetable peeler (that way it is easier to remove later) and reserve the lemons for the frozen yogurt.  Juice enough of the lemons to make 1/2 cup.

Combine the lemon juice and sugar in a small saucepan and bring to a boil over medium-high heat, stirring to dissolve the sugar. Once the sugar is completely dissolved, remove from the heat and let cool.

For the frozen yogurt, mix about 2 tablespoons of the milk with the cornstarch in a small bowl.  Whisk the cream cheese in a large bowl until smooth.

Combine the remaining milk, cream, sugar, corn syrup and reserved lemon zest in a 4-quart saucepan.  Bring to a boil over medium-high heat and boil for 4 minutes.  Gradually whisk in the cornstarch mixture.  Bring the mixture back to a boil and cook, stirring with a rubber spatula until slightly thickened, about 1 minute.  Remove from the heat.

Gradually whisk the hot milk mixture into the cream cheese until completely smooth. Stir in the yogurt and lemon syrup until smooth.  Cover the bowl with plastic wrap and refrigerate until cold, several hours, or over night.  Alternatively, place the bowl in a larger bowl that has been filled with ice cubes and very cold water, creating an ice bath.

Meanwhile, make the blueberry swirl.  Mix the blueberries and sugar in a small saucepan.  Bring to a boil over medium heat.  Reduce the heat and simmer, stirring occasionally, until the berries are tender and the sauce is thickened, 8-10 minutes.  Remove from the heat and let cool completely before using.

To make the frozen yogurt, remove the zest and freeze the yogurt mixture in your ice cream maker according to the manufacturer’s instructions.  As you pack the frozen yogurt in a container to freeze, swirl in the blueberry sauce.

Source: Adapted from Jeni’s Splendid Ice Creams at Home

Triple Vanilla Scones

Triple Vanilla Scones

Yesterday, we got hit with a classic Nor’easter. It snowed and blew all day long. We probably got a whopping 14 inches. On top of the 6 we already had. And now they are talking more snow Friday and another big storm Monday! At least we can sled and snowshoe! I much prefer a winter with a lot of snow. It makes the cold that much easier to bare.

With all this snow and cold weather, it makes me want to bake. Who am I kidding- I love to bake no matter the weather or season! These scones have been on my to-do list for a while. Vanilla anything gets me excited. I have all these vanilla beans sitting in my pantry just waiting to be used. Especially since my ice cream making has slowed down. And, these scones are another perfect excuse to use some of that wonderful vanilla sugar I told you about.

Triple Vanilla Scones

Sitting down with my cup of coffee, a warm scone, and snuggling up with a quilt to watch the snow, was the perfect way to start my morning. These scones are moist, a little flaky, and full of flavor. The vanilla is heart warming. And they remind me of summer. The perfect way to start any day.

Triple Vanilla Scones

Triple Vanilla Scones

Yield: 10 scones

For the scones 

  • 2 cups all-purpose flour
  • 6 Tablespoons vanilla sugar*
  • 1 Tablespoon baking powder
  • 1/2 teaspoon coarse salt
  • 8 Tablespoons cold unsalted butter, cut into small pieces
  • 1/3 cup milk
  • 1 Tablespoon vanilla extract
  • 1/2 cup low fat plain greek yogurt (I used whole milk plain yogurt and it was fine)

For the glaze

  • 1 cup confectioners’ sugar
  • 1 vanilla bean, split lengthwise
  • 4-5 teaspoons milk

Directions

Preheat the oven to 400ºF. Line baking sheet with parchment paper or a silicone baking mat. Set aside.

In a medium bowl, whisk together the flour, vanilla sugar, baking powder and salt. Toss in the butter pieces to combine. Using a pastry blender or two knives, cut the butter into the dry ingredients until the largest butter pieces are the size of peas and the mixture resembles coarse meal.  Add the milk, vanilla and yogurt to the bowl.  Mix together lightly with a spatula or fork until a sticky dough comes together.  Very gently, knead lightly with your hands to incorporate the remaining loose flour. Don’t over knead, or your scones will be dense.

Turn the dough out onto a lightly floured surface.  Pat the dough out to approximately an 8-inch square. Fold into thirds like a business letter.  Pat the dough out into a 5×10-inch rectangle.  With a lightly floured large knife or a bench scraper, slice the rectangle in half lengthwise. Then cut each half into 5 equal rectangles to make 10 scones total.

Transfer the scones to the prepared baking sheet.  Bake, rotating halfway through the baking time, until golden on top and just set, about 12-14 minutes total.  Transfer to a wire rack to cool slightly.

While the scones are still warm, make the glaze. Combine the confectioners’ sugar and the seeds scraped from the vanilla bean in a small bowl. Whisk in the milk a teaspoon at a time until you have a glaze that is slightly thick but pourable. Drizzle the glaze over the warm scones.  Let set a few minutes before serving.

*To make vanilla sugar, split a vanilla bean and scrape the seeds into 1 cup of sugar.  Rub the vanilla seeds into the sugar with your fingertips until well combined and fragrant. Bury the vanilla bean pod in the sugar.  Cover and let stand for at least 2 days to allow the flavors to meld.

Source: Annie’s Eats

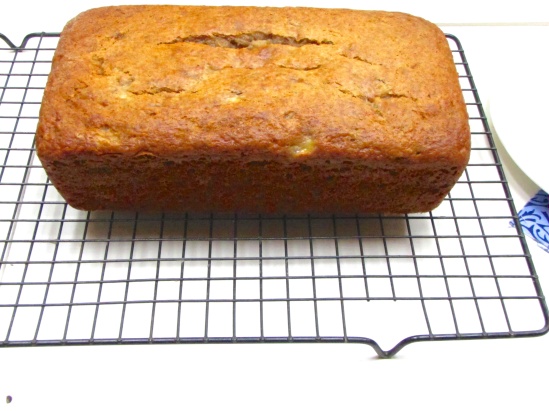
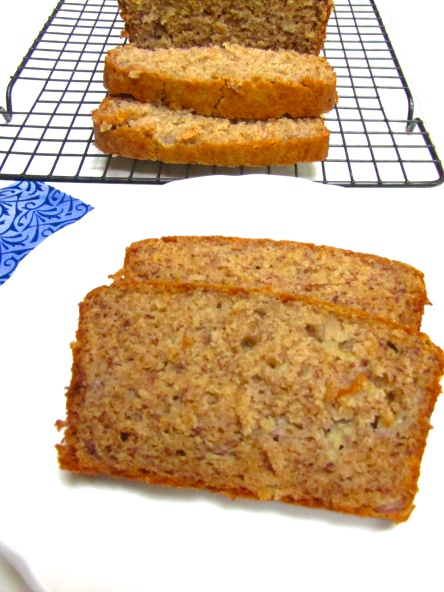
Banana Bread

Better for you banana bread

I love fruit and veggie breads. Something about them is so appealing and delicious. Maybe because it breaks up the monotony of plain ol’ bread. And it’s versatile because you can eat it any time of the day! I like to have it with breakfast alongside a smoothie, or with my morning coffee. Or sometimes as dessert!

Better for you banana bread (1)

This banana bread is a wonderful healthier version of the usual banana bread laden with butter. The yogurt makes a wonderful substitute for the heavy butter and oil, but still keeps it moist. This bread is bursting with flavor of all kinds. I amped up the cinnamon because I like it to be a little more than subtle. You all probably have your favorite banana bread recipe, but I was converted after the first time making this. I will never go back!

Banana Bread

  • 1 1/4 cups all-purpose flour
  • 1/2 cup whole wheat flour
  • 3/4 cup granulated sugar
  • 2 teaspoons baking powder
  • 3/4 teaspoon baking soda
  • 1/2 teaspoon salt
  • 1/2 teaspoon ground cinnamon
  • 1/4 teaspoon ground nutmeg
  • 3 large ripe bananas, peeled and mashed well
  • 4 Tablespoons unsalted butter, melted and cooled
  • 2 large eggs
  • 1/4 cup plain yogurt
  • 1 teaspoon vanilla extract

Directions

Preheat the oven to 325ºF. Grease a 8 1/2x 4 1/2-inch loaf pan. Set aside.

Whisk the flours, sugar, baking powder, baking soda, salt, cinnamon and nutmeg together in a large bowl. In a separate bowl, whisk the mashed bananas, melted butter, eggs, yogurt and vanilla extract together.

Gently fold the banana mixture into the flour mixture using a rubber spatula until just combined. Pour the batter into the prepared pan and smooth the top.

Place in the oven and bake until golden brown and a toothpick inserted into the center comes out with just a few crumbs attached, 55-65 minutes.

Let the loaf cool in the pan for 10 minutes before turning out on a wire rack. Let cool 1 hour before slicing and serving. Store in plastic wrap in the refrigerator up to 4 days, allowing to come to room temperature before serving.

Source: Adapted from America’s Test Kitchen Healthy Family Cookbook