

(Before picture. Please excuse the mess, I was in the middle of baking about 5 things. And of course, it was just before I painted the walls, so there is tape everywhere.)

So, I have been mentioning, here and there, about how I have been totally revamping our kitchen. We moved into our house in the middle of May this year, and we have been slowly chipping away at upgrading the house. It was built in 1910 with lots of great character. But, it also has horse-hair plaster walls, sloped floors and very out-of-date wall paper, rugs, cabinets, paint colors. But- I am totally okay with that. I love the idea of slowly changing things, and making it our own. My husband and I (mostly my husband), did a total wallpaper overhaul before we moved in. It took him two weeks straight of removing wallpaper from three rooms, repairing walls, sanding then painting. He took the day shift, then after the kids were in bed, I would come over and take the night shift of painting and cleaning. It was exhausting, but oh so worth it. We got the bigger things done before we moved in so we didn’t have to live around the mess of wallpaper pieces everywhere.

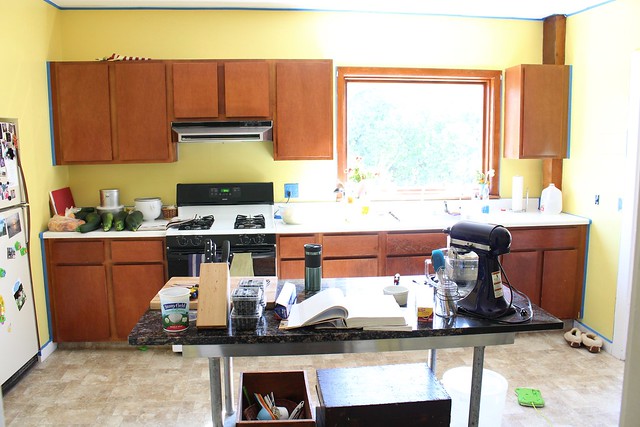
Since the kitchen is my place, my sanctuary, and where I spend a lot of my time, I was determined to re-do it this summer. The walls were bright yellow with outdated, wooden cabinets. Just yuck. I couldn’t stand the room. We didn’t want to replace all the cabinets because that gets costly, very quickly. I was set-on doing it myself to save as much money as possible. So, I did some serious research on the internet, and talked to some friends, about how to go about painting my cabinets. I really don’t like, or have the time, to do thorough sanding. So, after probably two months of research and finding pictures on Pinterest as inspiration, I decided to get to work. I ended up making my own chalk paint for the cabinets. There are several different recipes online, but I roughly did 1/3 cup plaster of paris, 1/3 cup water, then 1 cup Behr eggshell paint. I did three coats on all the cabinets, then I did two coats of poly-acrylic, crystal clear formula that is water based (oil based would make the white cabinets yellow over time). (If you don’t know about chalk paint, then you need to research it!! You don’t have to do any sanding, or at least very minimal, depending on the surface you are painting. It goes on so thick and smooth- I loved it!)

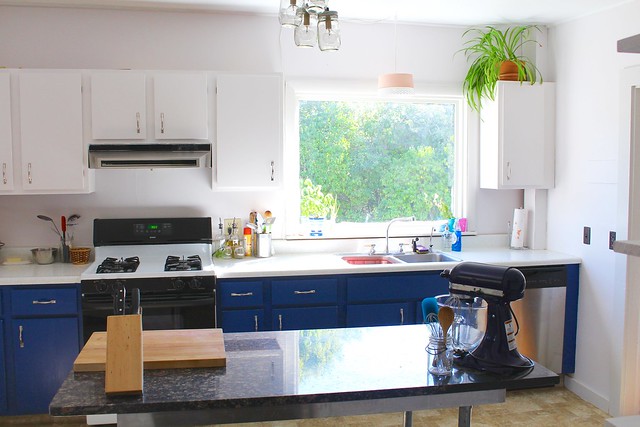
(After!!!)
I started by painting the walls. Even after finishing one wall with white paint, it made a world of difference. (I used Behr Ultra paint- eggshell, ambiance white- for the record!) Then, I took the top cabinet doors off. I placed them on a big table in the shed and got to work. I didn’t paint the inside of the cabinets, because I didn’t think it was necessary. Just the inside/outside of the doors and the outside of the cabinets. I did the top cabinets first, got them all hung back on, then started on the lower ones. Considering I was still using the kitchen full time, I didn’t want to overwhelm myself in trying to do it all at once. In the days of waiting for doors to dry (we had about two weeks of fog and damp days while I was trying to do this!), I painted the trim. I used Behr Ultra, semi-gloss, silver drop. It is the same color as my dining room, and I totally love it. It is a very light gray. And for the blue cabinets, I used Behr Ultra eggshell- admiral blue (keep in mind, I made it into chalk paint). The upper cabinets, I did the same color as the walls, just as chalk paint.
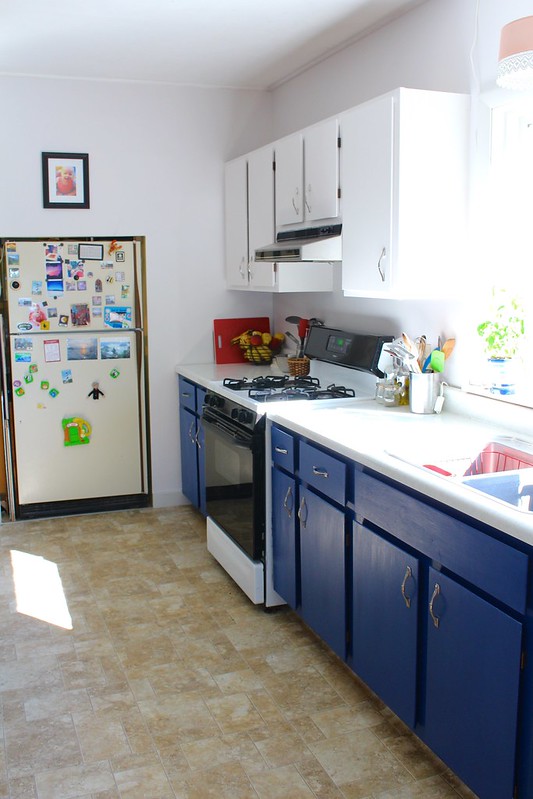
Before I painted the lower cabinets, my husband removed one cabinet and installed a dishwasher. What a world of difference that has made!! After I painted the cabinets, we installed handles. It dresses them up a lot. Some other additions we made are, I purchased two lights from Etsy for the kitchen. One is a beautiful pendent chandelier, made of six vintage Kerr jars that I hung over the kitchen island. That light, we were able to hook right into the wires that were already there (thanks to previous hideous neon lights), but the light over the sink is a plug in the wall with a switch on the cord. I love both of the lights, and they were both reasonably priced. Another favorite addition of mine are the four shelves placed on the wall. I love how I can access my baking goods so easily. And we can’t forget the killer island that was so generously given to me! The island is where I do ALL my prep and mixing. It is perfect to roll out pastries since the top is granite. The addition of that beautiful cutting board given to me by the neighbors has made a great space to work as well. I just love it all!

Overall- I am SO happy about the kitchen. I just love being in there now. When I say we are almost done, it’s because I still have several ideas for next year. I plan on taking down a cabinet and creating open shelves for the dishes we use. Also, we need to upgrade the thousand year-old fridge (ha!). I think we may leave it in the cut-out space in the wall, but just frame it in to make it look nicer. Also, distant future are new countertops and potentially new flooring. But, for now, we are done!


Sorry that I have written a novel. I am just so excited about it all, can’t your tell!? I hope you enjoyed seeing where all my creations come out of.
*All opinions are my own, Behr doesn’t even know who I am, and the guys I purchased the lights from don’t know I am a blogger.
